
Joomla Utilities is Rochen's New Joomla manager. It helps you install Joomla, Migrate Joomla, and offers new security options to help you stay protected.
It will be a helpful tool to those who need more control over security and permissions settings. For this guide, we are going to walk through the steps of Installing Joomla at Rochen.
Watch install video or follow the steps below
Before you begin, you will need:
- A Rochen account (Sign up)
- cPanel Username / Password
- DNS configured (Domain name pointed to Rochen Server)
Step 1: Log into cPanel at Rochen
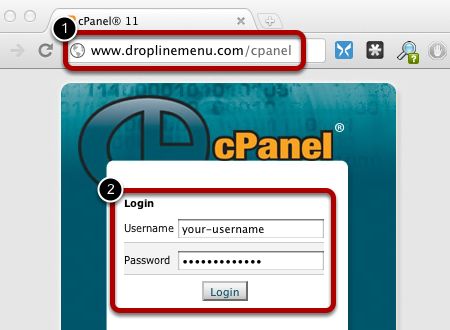
- Go to http://www.YOURDOMAIN.com/cpanel or http://www.YOURDOMAIN.com:2082/
- Enter your cPanel username and password.
*Note This information is available in the welcome email.
Step 2: Launch Joomla Utilities
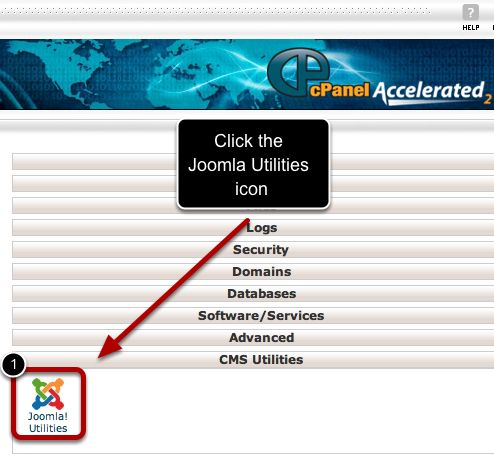
- Click 'Joomla Utilities' under 'CMS Utilities' to launch Joomla Utilities
Step 3: Start The Installation
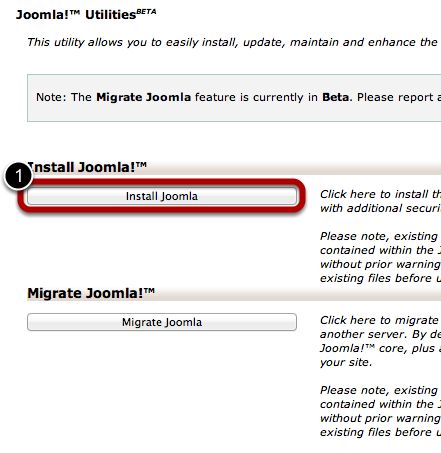
- Click 'Install Joomla' to start the installation process.
Step 4: Enter the details of your new Joomla site
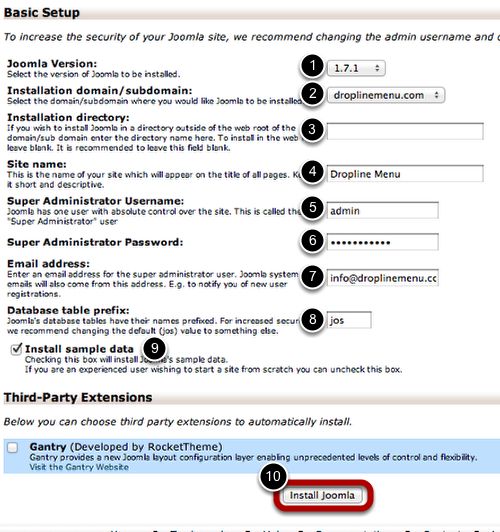
- Select the latest version of Joomla to install. At the time this tutorial was created, Joomla 1.7.1 was the latest version. In the future you may see 2.5 or above.
- Select the desired domain name. Most likely you will only have one option.
- *Optional - Enter the website directory. Only necessary if you are not installing to your root directory.
- Site Name. The name of your site. This can be changed after install.
- Super Administrator Username. This information will be used to login to Joomla.
- Super Administrator Password.
- Email Address. The Admin's Email. The Email that a lost password goes to. This can be changed after install.
- Database Table Prefix. In almost all cases, it is ok to leave this how it is.
- Install Sample Data. Good if you are new to Joomla. It will populate Joomla with sample articles, modules, menu items, etc... Otherwise this step crowd your website.
- Click the install button
*Note - This install method step skips the Manual Install steps which include the License Agreement and Database Configuration.
Step 5: Install Completion
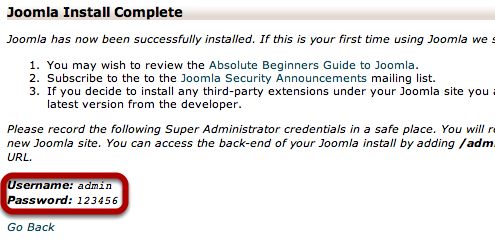
This screen reviews the information about to be installed onto your server.
*Note your Joomla Username and Password
Step 6: Verify your new Joomla site
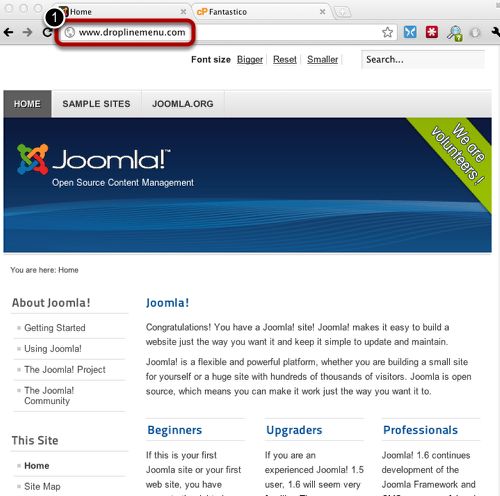
- Visit 'YOURSITE.com' (For us, it is http://www.droplinemenu.com) to make sure Joomla has installed successfully.
Step 7: Login and Start using Joomla
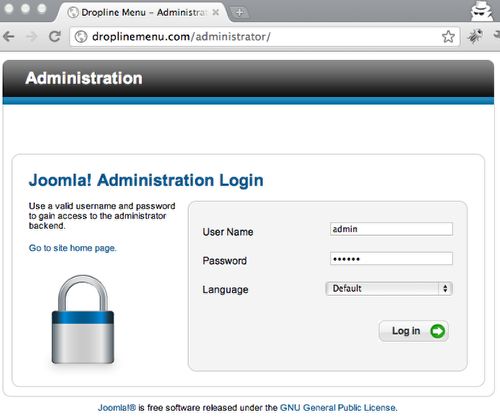
- Login to Joomla by visiting http://YOURDOMAIN.com/administrator.
- Start using Joomla. You can create articles, categories, menus and much more (Not Pictured).