

2 Most Common SiteGround Joomla Installation Methods:
- Standard Joomla Installer (Default built-in installer, this page)
- Softaculous (Third party one-click installer)
Standard Install -- To install with this method we will download the Joomla install package from the official Joomla website and upload it to our SiteGround website. Then we will take the package and extract the contents allowing us to access the install from the frontend.
Softaculous -- This method can be utilized from the cPanel and completed in a matter of minutes. This method is much easier but has less customization. Read more about how to install Joomla using Softaculous.
If you find this guide helpful and want to leave SiteGround a honest review please visit our SiteGround hosting review page and do so.
Before we get started, you need:
- SiteGround Account (Sign up)
- cPanel Username & Password
- DNS configured (Domain name pointed to SiteGround Server)
Step 1: Download Joomla Install Package
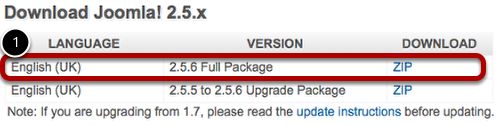
- Download the Joomla Install package (.zip) The package is available here: http://Joomla.org/download
*Note at the time Joomla 2.5 is the current version. Joomla has frequent releases every 6 months or so. Download the latest one.
Step 2: Login to SiteGround Control Panel
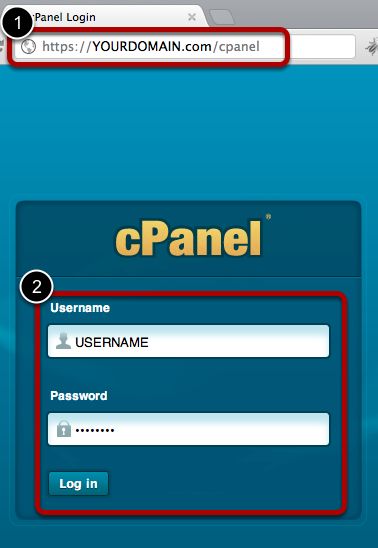
- Type in http://YOURDOMAIN.com/cpanel to get to the login screen
- Enter your cPanel Username & Password. Click 'Log in'.
Step 3: Launch 'File Manager'
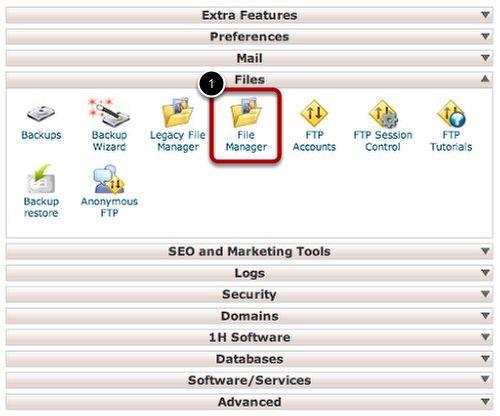
- Click 'File Manager' in the 'Files' section (Select "Web Root" in the message box that appears after you click on 'File Manager'. Web Root puts you into the public_html folder).
Step 4: Upload Joomla Package Using "File Manager"
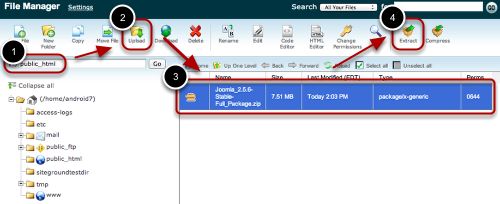
- Verify you are in the "public_html" folder (This is the top level folder).
- Click Upload. In the upload window, click 'Choose File' or 'Browse'. Select the Joomla Install Package (The '.ZIP' Joomla package) that was downloaded from Joomla.org onto your computer, and click 'Open' (This is a separate window. Not pictured.).
- Highlight uploaded Joomla install package (It will read something like Joomla_2.5.6-Stable-Full_Package.zip).
- Click ‘Extract’ (You should be careful which files are in the same directory that you install to. Extra files could mess up Joomla).
*Optional - You can also upload the .Zip of Joomla via FTP. Filezilla FTP client is great free software that we recommend using for this.
Step 5: Go To MySQL Databases Creation Screen
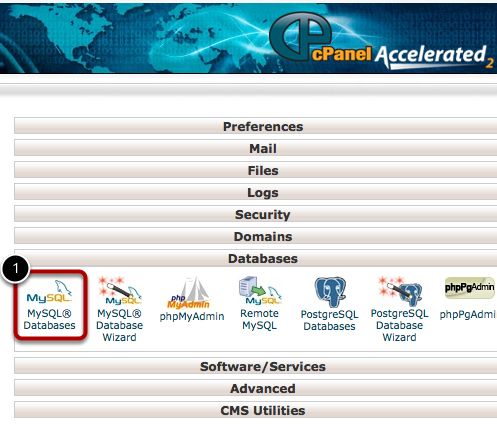
- Click on ‘MySQL Databases’ after scrolling down to the "Databases" section in the SiteGround control panel.
Step 6: Create MySQL Database and User
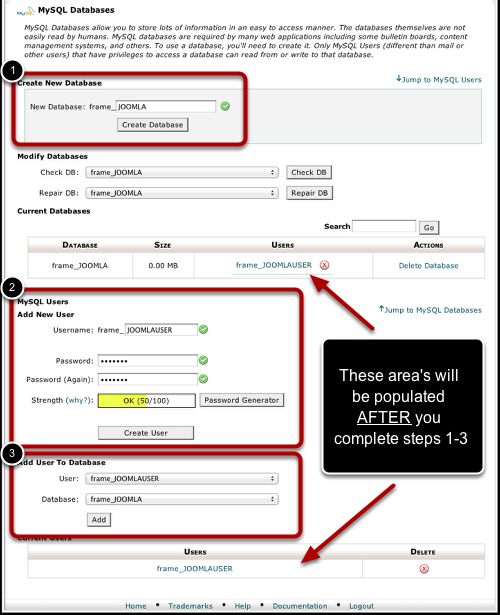
- Create a New Database by entering 3-4 (Where we have x’s in the example) characters where it says ‘New Database: YOURUNIQUEID_XXXX’ (For droplinemenu.com our database is called ‘frame_JOOMLA’), then click ‘Create Database’.
- Create a New User by entering 3-4 characters where it says ‘Username: YOURUNIQUEID_XXXX’ (For droplinemenu.com our username is ‘frame_JOOMLAUSER'), create a strong password, then click ‘Create User’.
- Add the USER to the DATABASE by selecting ‘User: YOURUNIQUEID_XXXX’ to ‘Database: YOURUNIQUEID_XXXX’ (For droplinemenu.com it is ‘User: frame_JOOMLAUSER’ to ‘Database: frame_JOOMLA’) and click ‘Add’.
- Check ‘All Privileges’ and click, ‘Make Changes’ (Not Pictured).
*Note - Write this down because we are going to use this information in a few minutes.
Step 7: Start The Joomla Install
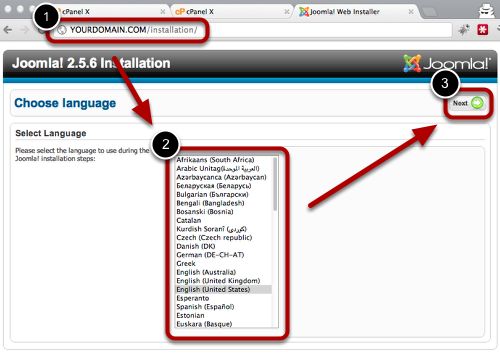
- Visit http://YOURDOMAIN.com/installation/ (For us it is http://droplinemenu.com/installation) to start the web-installation.
- Choose your language.
- Click 'Next'.
Step 8: 'Pre-Installation Check' Install Step
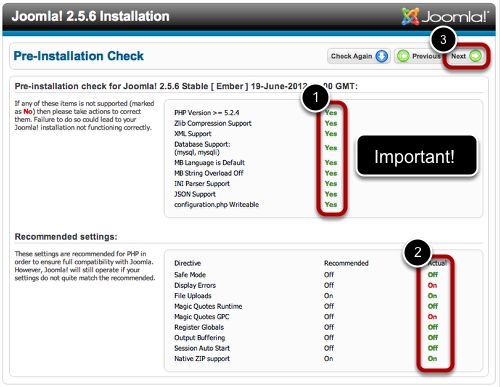
- It's important all areas say, ‘Yes’ in green. If any of these settings say 'No' in red, consult Joomla.org’s help section for more information.
- 'Recommended Settings' are not required, but green means you are good to go.
- Click ‘Next’.
Step 9: Joomla 'License'
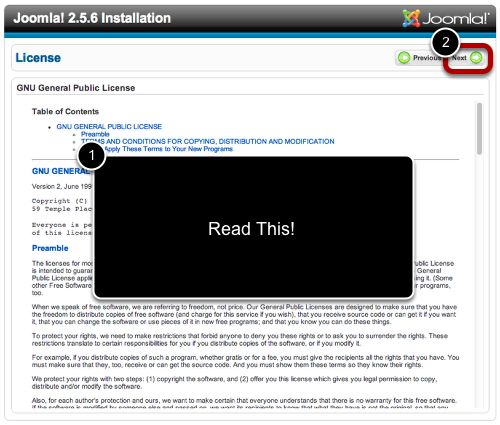
- Agree to the GNU Public License.
- Click ‘Next’.
Step 10: Joomla 'Database Configuration'
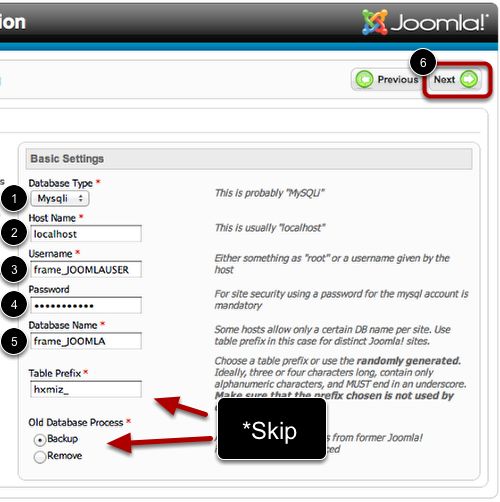
- MySQLi (Most common. It should work for you.)
- Host Name: localhost (Joomla defaults to this)
- Username: YOURUNIQUEID_XXXX (Ours is frame_JOOMLAUSER)
- Password: YOURPASSWORD
- Database Name: YOURUNIQUEID_XXXX (Ours is frame_JOOMLA) *Note - Skip over ‘Table Prefix’ and/or ‘Old Database Process’ unless you know what you're doing. 'Table Prefix' is now randomly generated per installation of Joomla for security reasons.
- Click ‘Next’.
Step 11: Joomla 'FTP Config' (Skip)
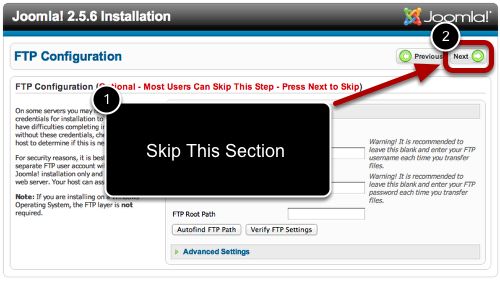
- Unless you know how to set this, we are going to skip it.
- Click ‘Next’.
Step 12: Joomla 'Main Configuration'
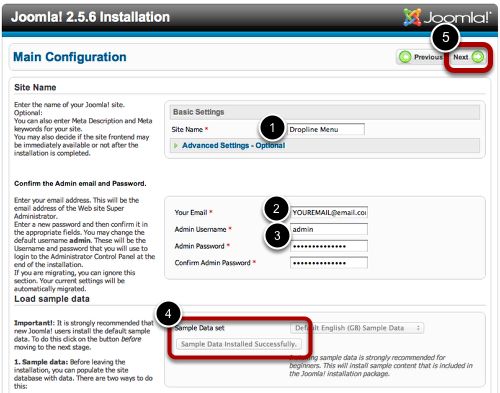
- Type in desired website name into ‘Site Name’ (Ours is Dropline Menu).
- Enter the email you plan to use with Joomla.
- Enter Joomla admin login information (username and password).
- Choose if you want Sample Data. *Note Sample Data populates your new Joomla site with preinstalled modules, articles and components so you can see what this site looks like with content..
- Click ‘Next’
Step 13: 'Finish'
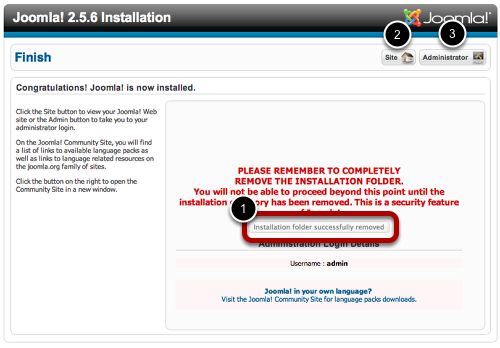
- Click ‘Remove Installation Folder’ so that you can access your website
- Visit your site to see the installation
- Login to Joomla administrator to start building your website (http://YOURDOMAIN.COM/administrator). Congratulations! Once you sign into Joomla through the administrator login, you can start creating your website.
Step 14: Visit Your New Joomla Site
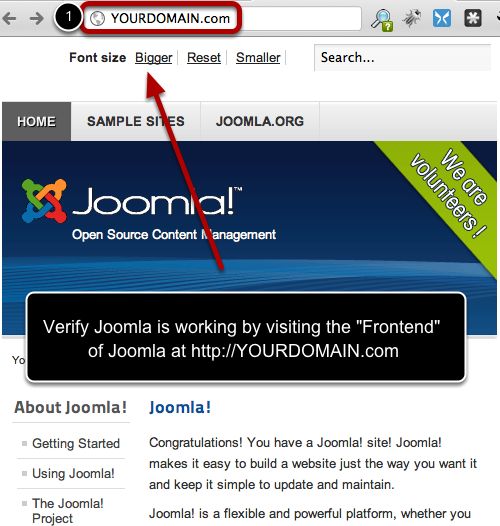
- Visit the "Frontend" of the site to make sure it is working properly. Go to YOURDOMAIN.COM ours was DROPLINEMENU.COM. Your website should look similar to the image above.